TIG welding is a style of welding that uses non-consumable tungsten electrode and a shielding inert gas.
In terms of welding quality, TIG welding is better than most welding processes. The process lessens atmospheric contamination. The welder also has more control over the welding area and power used.
Contents:
1) What is TIG (GTAW) Welding?
2) TIG Welding Protective Gear
4) TIG Welding Process and Tips
4.1 Practicing on Common Metals
What is TIG (GTAW) Welding
The ‘TIG’ stands for Tungsten Inert Gas for the components used by the welding process. Others also call it GTAW, which stands for Gas Tungsten Arc Welding. However, most people simply call it TIG welding nowadays.
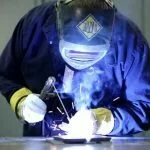
TIG welding protective gear
To start TIG welding, you should first consider the protection that you will need. Just like with any type of welding, prolonged close exposure to the light of the process will cause sunburn-like injuries. To prevent this from happening, you should protect your exposed skin from the heat while doing the task.
Your arms in particular, will be exposed to the light, heat and sparks from the weld. You should use leather gloves to protect your hands.
For your clothes, you should choose clothing type that will block the sparks from hitting your skin. You should avoid clothing materials that may melt with heat. Ideally, you should use cotton pants and top. You should also wear long-sleeved clothes to protect the length of your arm.
Lastly, you should use safety shoes or leather shoes to protect your feet. The tougher your shoes are, the better. You may want to use black ones so that burn marks will not be visible. Sandals and plastic footwear are to be avoided.
When you are welding, your face will be close to the action. You need to invest in a good welding helmet if you think that you will be doing this for a while. Modern welding helmets do not only cover your face, they also cover your entire neck area.
Ideally, you should choose a helmet with a wide window. These types of helmet will give you the best visibility of the welding area. When testing them out in the store, you should check the areas covered by the helmet and the darkness of the lenses. The absence of smoke in TIG welding exposes the operator to brighter light. Dark lenses prevent disruption of vision while working.
Some modern helmets feature darkness control for the lenses. This type of helmets allows the user to control the darkness according to the brightness that the arc creates. Welding lighter materials for example, creates less brightness. The operator can adjust the brightness for these types of applications. For heavier materials, the arc will be significantly brighter. In this case, the operator can turn the dial to increase the darkness of the helmet.
Just like with other welding techniques, the extreme heat that the process creates may break down gases or liquid chemicals near the working area. The operator needs to make sure that there are no flammable or poisonous chemicals around while welding. The heat will cause a chemical reaction to these substances. They can either create fumes or start a fire.
TIG Welding Equipment
TIG / GTAW Power Supply
The power supply for welding is one of the bulkier tools used in the process. However, as technology improves, the machines used are becoming smaller. You can now get an industrial-level machine at a portable size. The power is usually controlled by a foot pedal or a heat control in the hand torch. Old school welders prefer the foot pedal. However, a control in the handle is ideal for welding on your back of above ground.
When choosing machines, you should choose the ones that give you the widest range of options while working. For instance, you need to choose a machine that allows you to work with both direct and alternating currents. You should also choose machines that give you maximum control so that you will be able to work on both delicate and heavy metals. When working with aluminum for example, you will need to use alternating current. In this mode of welding, you should have control over the direction of the electrons in the process. Modern machines allow you to have control over the electrode’s positive and electrode negative sides when welding with alternating current. These types of machines allow you to have better control over the penetration to the workpiece.
To check the features of the machine that you are getting, you should examine the various parts of its control panel. You should also ask questions about the features that you want from the person selling it.
To prepare the machine for TIG welding, you need to set the proper machine setting. You should use the following setting setup as guide:
-
Polarity: AC vs DC
Most types of applications use direct current. However, some types of metal, like aluminum, use AC.
-
Welding Process
In the welding process setting, you should choose the option specified for TIG welding. This is usually labelled as TIG or GTAW High Frequency Impulse. This process setting allows the welding process to happen when the operator steps on the pedal. In this process, you just need to hold the electrode close to the metal to start welding.
In other settings, the electrode needs to touch the metal before it activates. This type of process is not ideal for TIG welding because it has a higher chance of contamination.
-
Pre Flow and Post Flow
This setting is responsible for controlling the inert gas flow into your welding application. It allows the operator to decrease the level of contamination of the workpiece by shielding it with the inert gas. The pre flow process can be set to manual, so that you have control over the process.
The post flow setting is important to continue the flow of the gas even after the welding process. By using post flow setting, you let the gas shield on the electrode to linger, preventing oxidation and resulting to a cleaner product.
You need to set your post flow proportionally with your welding amp. Most experts will tell you that you need 1:10 ratio between post flow time (in seconds) and welding amps. If you are working with 150 amps for example, you can use 15 seconds of post flow. This is a general rule of thumb and can be adjusted, depending on your application and your personal experience with your machine.
-
Other Settings
The machine you get will have other features added to it but the above settings are the most important for TIG welding. When checking out the machine, you should also check the amperage range and the ability to control the waveform. Older machines do not have waveform control but newer ones do have this feature. Higher frequencies in this setting will create more penetration in the workpiece.
Welding Torches
There are three types of TIG welding torches. A complete torch is the most common. The welding torch has two structural parts, the tubes and the hand piece. The complete torch has a large hand piece but it only has one tube for the inert gas.
The water-cooled torch has a smaller hand piece for welding in a small space. However, it has three tubes connected to it. One of the tubes is for the inert gas while the other two tubes are for the water coming in and out of the hand piece.
The most advanced torch is the straight torch with a replaceable tip. The straight torch has a default tip with the electrode sticking out. This allows the operator to weld in areas with small openings. This is usually used for welding in the electronics and semiconductor industry. The tip can be changed according to the needs of the operator.
The price tags of these torches vary. The ones with better features will cost more. Some torches for example, have specialized gas noses to control gas flow, while others have noses that allow the tungsten to protrude outwards. For a more cost effective approach, you should buy the type of torch that fits the need of your application.
Tungsten Electrode
Tungsten electrodes are used to transfer the electricity from the power source to the workpiece. This is one of the vital parts of the welding process. Tungsten is a special metal because it has the properties that welding needs. Tungsten has a very high melting point so it does not melt even with the heat produced with the process. It is also used because it is soft enough to be sharpened to make the welding point narrow.
For most applications, you will be using tungsten alloys for your electrode. Pure tungsten is only used for welding specialized materials. You should choose tungsten alloyed with rare earth metals.
If you need the highest current-carrying capacity, you should use Lanthanated electrodes. They are also not easily contaminated. They can be used for both AC and DC welding. The tips of tungsten alloys are color coded to tell users the type of tungsten electrode they are using. Lanthanated tungsten electrodes have a golden tip.
Ceriated tungsten electrodes can also be used for both AC and DC welding. Though they do not have the high current-carrying capacity of Lanthanated tungsten electrodes, they still have better arc stability and current capacity than pure tungsten and the radioactive thorium-tungsten alloy. This type of tungsten electrode has an orange tip.
These two types of electrodes are the best ones to use for modern TIG welding machines. Thoriated electrodes (red tip) should be avoided because they emit radiation. Tungsten-zircon alloys (brown tip) are only used for specialized applications. It has the best arc stability among tungsten alloys, but it can only be used for AC applications.
-
Electrode Size
You may also be confused by the wide range of tungsten electrode diameters. Thicker tungsten electrodes can handle more current. If the tungsten electrode you are using is too small for the current, it will melt when you step on the pedal.
For the length of the electrode, you can easily cut it to fit the welding area if you are working in tight spaces. You can use a regular belter wheel to cut the tungsten without contaminating it. There are many other ways to cut an electrode, but you need to make sure that the process you use does not contaminate it.
-
Electrode Preparation
Tungsten electrodes are sharpened before use. The direction of the grinding should be perpendicular to the length of the electrode. In a belter wheel for example, you should not sharpen the electrode sideways because it will create a different groove.
The sharpening process can create contamination. If the application requires a clean weld, you need to use a tungsten grinder or a belter machine used exclusively for sharpening tungsten.
If lives depend on your weld, you should make sure that you prepare your electrodes right. Beginners should start with less important welds with greater margins of error.
Tip: you should attach the tungsten to an electric drill when sharpening it against a belt or another type of spinning grinder.
Shielding Gas Supply
You will have two options in the type of shielding gas to use for TIG welding. Argon is the gas of choice for most applications. Specialized applications will require either helium or an argon-helium mixture.
When using your argon or helium tank, you need to learn to operate it to minimize leakage and to prevent accidents. From a closed valve, you need to start slowly when opening the tank. This will prevent the gas from rushing into the diaphragm (the part connecting the tank to the tube). When operating the welding machine, you need to make sure that the gas valve is turned to the top. This prevents leakage of the gas in the step of the tank.
You can then adjust the amount of gas flowing to your weld through the gauge before the tube. The volume of gas required depends on the type of welding application.
You should place the bottle in an area where it will not fall down. Damage to the stem may cause the inert gas to rush out and convert the tank into a gas rocket.
TIG Welding Process and Tips
Step 1: Prepare the workpiece
To start, you need to prepare the workpiece so that it is free of contamination. You need to make sure that there is no grease, dust or rust on the workpiece.
In the process, you should also ask experts around you for the best type of filler rod to use. Just remember that is should be at the same melting point as the workpiece metal. The folks at your filler rod stores usually know which filler rod to use for the type of metal you are working on.
Step 2: Prepare your equipment
Before you start welding, you should prepare the operational and safety equipment first. You should also prepare the working area so that your power supply, gas source and working space will not be disturbed. Make sure the electrode is properly sharpened and the right tip is attached to your welding torch for the type of application you are working on. You should also make sure that the electrode size would be able to handle the current that you will use.
Step 3: Set up your machine
After setting everything up, you should adjust the machine settings as instructed earlier in the article.
Step 4: Start welding
To start welding, you should first set your body in the best position. If you are lying down when welding, you should make sure that the sparks are not falling on top of your face.
You should also make sure that you can hold the torch at the right angle to do a proper weld. Before you start welding, you should hold the torch vertical against the workpiece. You should then decide on the direction of travel of your weld. Next, you should adjust the angle of your electrode between 10 and 20 degrees, with the electrode tip facing towards the direction of your weld.
After that, you should press the pedal to start the flow of gas. You should allow the gas to flow continuously for a few seconds before welding to decrease the chances of contamination.
As you start to weld, make sure to keep the electrode at 1/16th of an inch from the workpiece. Keep it in place until the right amount of puddle is formed. You should then move the electrode towards the direction of your weld while maintaining its distance and angle towards the workpiece.
Tip: You should practice without using a filler rod just to get the position of your hand right. You can just add the filler rod later when you are comfortable with the sequence. When using the filler rod, use it in the tip of the puddle. Putting it at the center will melt off too much filler.
At the end of your weld, you need to keep the electrode in the end of your welding line to allow the post flow gas to keep flowing, protecting the weld and the electrode from oxidation until they cool down. After the post flow process, you can take the electrode away to check your work.
Practicing on Common Metals
To learn to do TIG welding, you need to practice with the types of metals that you will work with. You can put a piece of metal on your worktable and start welding just for practice.
Tip: If you are practicing on a steel tabletop, you should put another material in between the workpiece and the table to prevent them from becoming welded together.
Here are some tips when welding common metals:
-
TIG welding aluminum and magnesium
You need to use AC when TIG welding these types of metal. The metals should be cleaned before you work on them. For thicker workpieces, there may be a need to preheat the metal for better penetration. AC will clean the area well that will prevent contamination of the weld. Because you are using AC, it is better to use zirconated electrodes for these types of metals. To weld aluminum you should also use blunt electrodes with argon as the shielding agent.
-
TIG welding stainless steel
You should also practice welding stainless steel. Just like with other metals, you should clean the surface of this type of workpiece. You can use alcohol or acetone to do this. Stainless steel does not require preheating because they are generally thin.
The general electrode types (Lanthanated and Ceriated) can be used if you do not want to use thoriated electrodes. The electrode should be sharpened for this kind of metal. For thin steel, you can use argon. However, thicker workpieces may require helium for shielding.
-
TIG welding copper
Welding copper requires general preparations. You need to have it cleaned by brushing the surface or rubbing alcohol on it. This type of metal usually requires preheating. Copper is a softer metal so you need to keep track of your heat. You should also run the electrode slowly so that you get the penetration that you want. Argon is the gas of choice for thinner workpieces. Argon-helium mixture can be used if the metal is beyond 5mm thick.
-
TIG welding cast iron
Cast iron is one of the most difficult metal types to weld. They are generally preheated to improve penetration and to decrease the rate of cooling. You should also keep track of the heat when TIG welding iron. When you reach 780 degrees Celsius, this type of metal can crack. You should also keep the welding time slow to improve penetration. You should allow the metal to cool on its own without using water or other substances to hasten the cooling process. Even if you do everything right, cast iron can still crack in the length of the welded line. If the workpiece needs to be watertight, you can use helium to ensure purity of the welded area.